
To create shortcuts on the Dashboard for use as a Back Office shortcut, you can open any of the multiple functions or reports and select the Shortcut button to create it.
The Shortcut Link is located at the top right of any window that is able to be created next to the exit button. Pressing this button will enable the creation of the Shortcut.
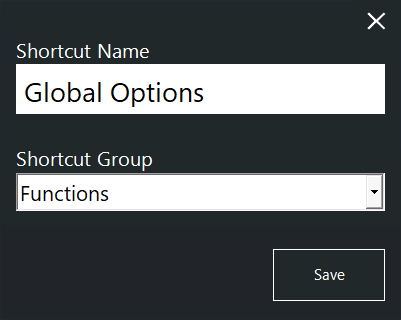
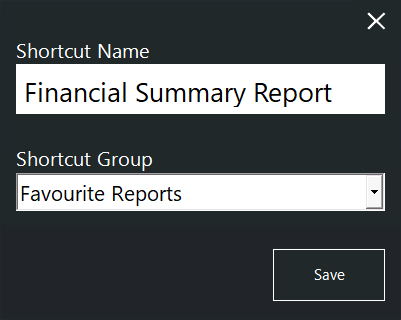
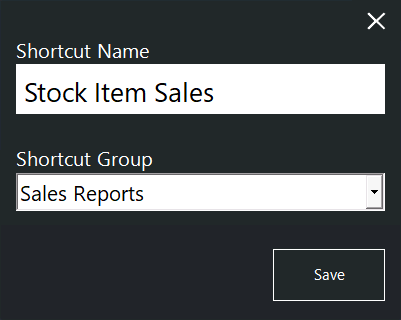
A prompt is displayed enabling you to choose which Shortcut Group to save the Shortcut to:
The Shortcut will be created on the left-hand side of the Dashboard. It will be saved to the Shortcut Group that was selected at the time the Shortcut was created.
A Shortcut can also be created for the Log Out Function.
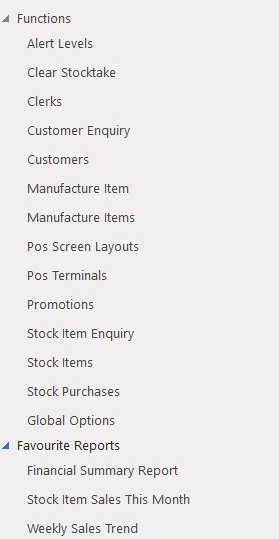
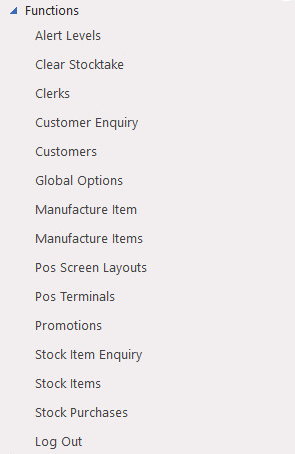
To create a shortcut for the log out function, right click on the 'Functions' heading located on the right hand side of the Dashboard, then select the option 'Add Log Out'.
Log Out will be added to the list of Functions.
When creating Shortcuts, you will be able to enter the Shortcut Name, and select which Shortcut Group to save it to.
It is also possible to create multiple shortcuts for the same function (e.g. Journal History Report).
When creating Shortcuts for a function or report, the Period (e.g. Today, Yesterday, Last Week, etc.) will be used when the report is run via the Shortcut.
The Period will be relative to the current day/date on which the Shortcut is being run (e.g. running a Shortcut for "Journal History Last Week" will automatically calculate the date range for last week based off the current date that the shortcut is being run on).
If you want to delete the shortcut, you can right-click or long-press on the shortcut.

If the Yes/No Option Confirm you are about to Delete Shortcut on Dashboard is enabled, a confirmation window will display.

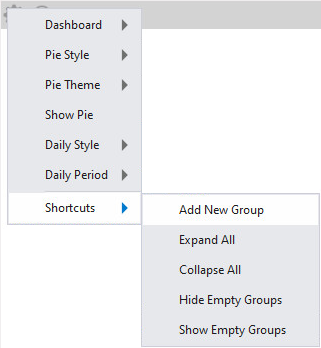
Shortcut Groups can be created to better organise and group your Shortcuts together.
To create Shortcut Groups, press the cog icon at the top of the Back Office Dashboard, then select Shortcuts > Add New Group
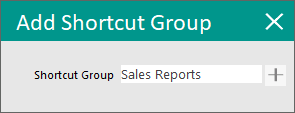
You will be prompted to enter a Shortcut Group name. Pressing the "+" button will create a Shortcut Group for the entered name.
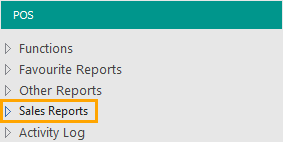
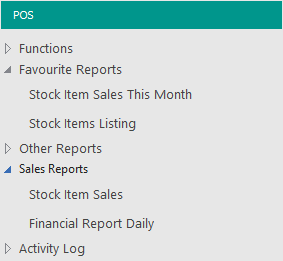
Shortcut Groups that are created will appear on the left-hand side of the Dashboard.
Note!
Shortcut Groups are Global, meaning that when a Shortcut Group is created, it will appear at all Sites.
Shortcuts are Site specific, meaning that when a Shortcut is created on a terminal within a Site, it will only appear on other terminals that are located at the same site.
Once Shortcut Groups have been created, shortcuts can be saved or moved into those groups.
To save a report shortcut into a Shortcut Group, simply press the "S" button on the top-right corner of a report, then enter a Shortcut Name and select the required Shortcut Group from the Shortcut Group dropdown menu.


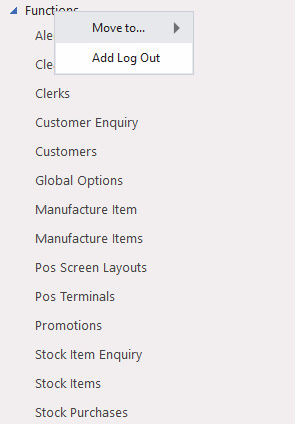
Shortcuts that already exist can be moved to any Shortcut Group by right-clicking on an existing shortcut and selecting the required Shortcut Group within the "Move to..." menu.
The below example shows the "Financial Report Daily" shortcut being moved from the "Favourite Reports" group into the "Sales Reports" Shortcut Group.

Shortcuts and Shortcut Groups can be deleted by right-clicking on them within the left-hand side Shortcut menu and selecting the "Delete Shortcut" option.
If a Shortcut Group is deleted via the Delete Shortcut option, the Shortcut Group must contain no Shortcuts; attempting to delete a Shortcut Group that still contains shortcuts will display a prompt "Cannot delete Shortcut Groups with Items".